
Everything you need to know to get started with the Railcrew Xpress Client Portal
The Railcrew Xpress Client Portal is a web application that gives you real-time visibility into your crew transportation operations. From the portal you can view active trips, search trip history, create new trip requests, track vehicles on an interactive map, and manage users within your organization.
The portal is available at clientportal.railcrewxpress.com. Please bookmark this address for easy access.
| Feature | Description |
|---|---|
| Login | Microsoft SSO or email verification |
| Active Trips | Real-time view of in-progress trips |
| Trip History | Searchable history with status indicators and pagination |
| Trip Creation | Submit new trip requests with passenger details |
| Maps | Interactive Mapbox maps with vehicle and hub tracking |
| GPS Route Tracking | View the exact route taken for any completed trip |
| Vehicle Management | Fleet visibility including unit numbers, assignments, and status |
| User Management | Invite users, assign roles, and track login activity (Admin only) |
The Client Portal uses Microsoft Entra ID as its identity provider. This means you sign in with your Microsoft account or receive a secure one-time code via email. For selected organizations whose email domains are not compatible with Microsoft Entra ID, the portal uses an alternate one-time passcode (OTP) method described below. In every case, Railcrew Xpress does not store any passwords.
If you have a Microsoft account (Outlook, Hotmail, or an organizational Microsoft 365 account), you can sign in using your existing credentials. If you are already signed into another Microsoft service, single sign-on (SSO) may log you in automatically without re-entering your password.
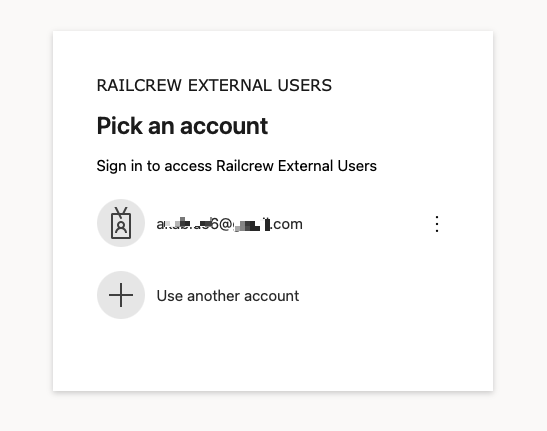
The Microsoft sign-in screen where you select or enter your account
If you do not have a Microsoft account, you can still sign in securely. Each time you log in, a one-time verification code will be sent to your registered email address. Simply enter the code to access the portal. No password is required.
Tip: If you don't see the verification email, check your spam or junk folder. The email will come from Microsoft on behalf of Railcrew External Users.
Some organizations use email systems that are not compatible with Microsoft Entra ID. If your domain is set up this way, the portal automatically uses an alternate one-time passcode (OTP) method instead of the Microsoft sign-in screens. You will not see a Microsoft password prompt — instead, you receive a fresh 6-digit code by email each time you sign in. No password is required.
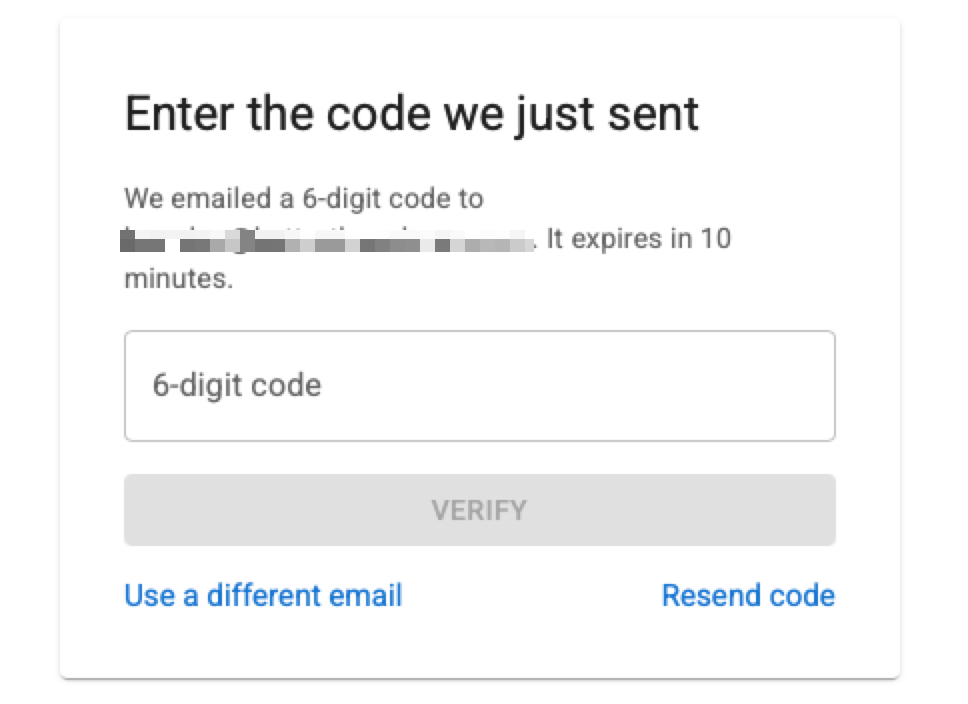
The OTP screen where you enter the 6-digit code sent to your email
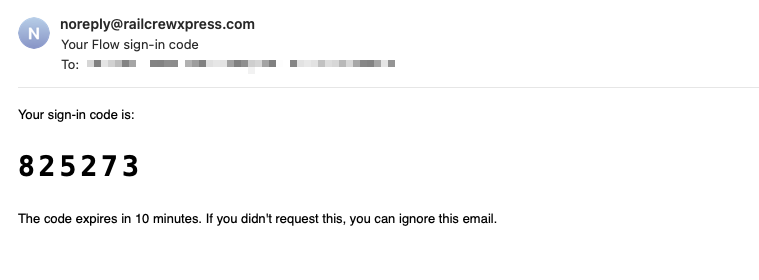
The sign-in code email, sent from noreply@railcrewxpress.com
Tip: The code arrives from noreply@railcrewxpress.com with the subject "Your Flow sign-in code". If you don't see it, check your spam or junk folder. If the code expires before you use it, click Resend code. To correct a mistyped address, click Use a different email.
The first time you sign in, Microsoft will ask you to accept basic permissions that allow the Railcrew External Users application to access your profile information. This is a standard Microsoft consent prompt.
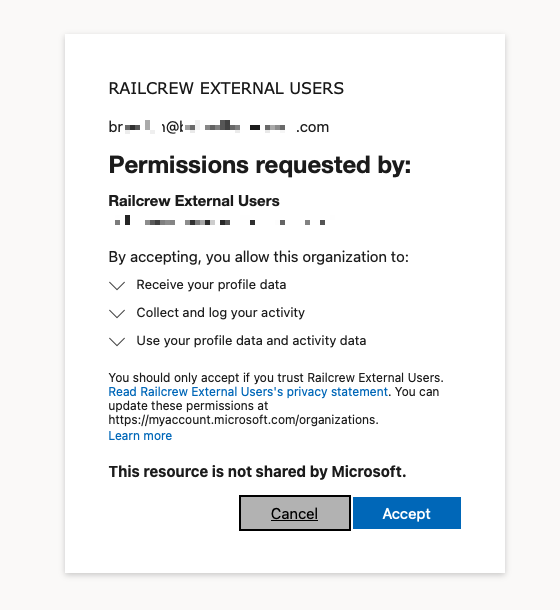
The permissions consent dialog shown on your first login
The permissions requested are:
Click Accept to continue. You will only need to do this once. You can review or revoke these permissions at any time at myaccount.microsoft.com/organizations.
The Active Trips view shows all currently in-progress trips for your organization. This is the default view when you log in to the portal.
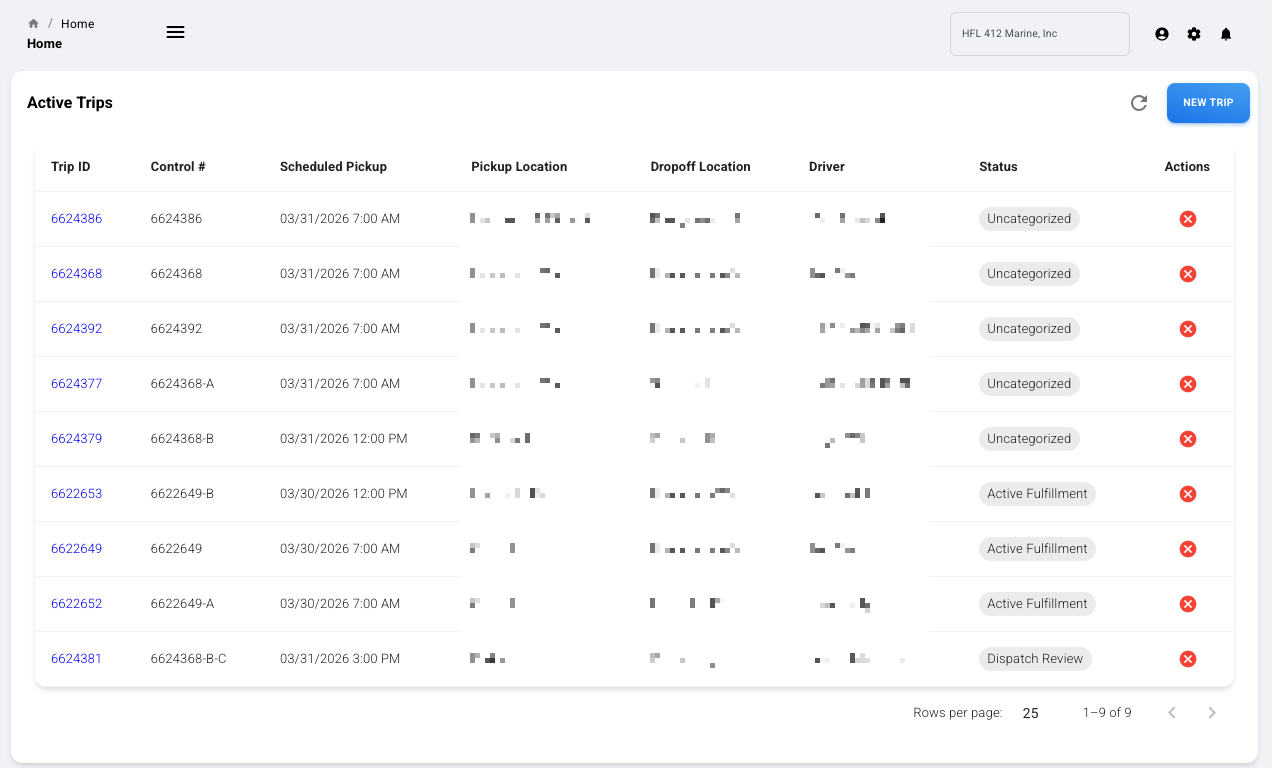
The Active Trips view displays real-time trip information
The Active Trips table displays the following information for each trip:
Tip: Use the + Add Trip button in the top right to quickly create a new trip request from this view.
The Trip History view allows you to search and review past trips. Use the filters at the top to narrow your results by date range, control number, or other criteria.
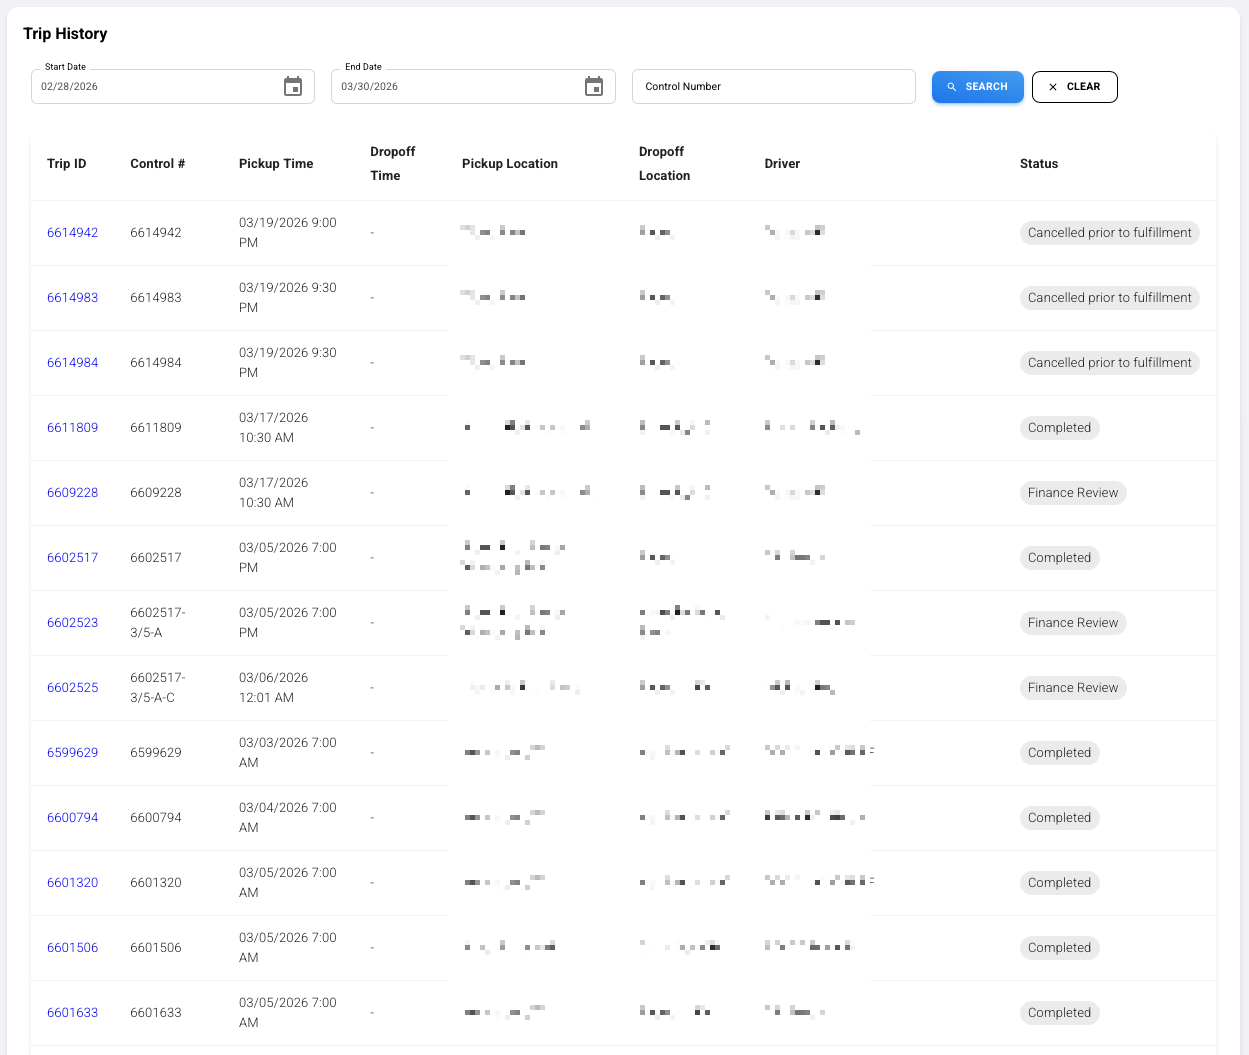
Trip History with search filters and paginated results
The Trip History table includes the same fields as Active Trips, plus:
Use the search filters at the top of the page to find specific trips:
Results are paginated. Use the navigation controls at the bottom of the table to move between pages. You can also adjust the number of rows displayed per page.
To request a new trip, click the + Add Trip button from the Active Trips view, or navigate to the trip creation form from the sidebar.
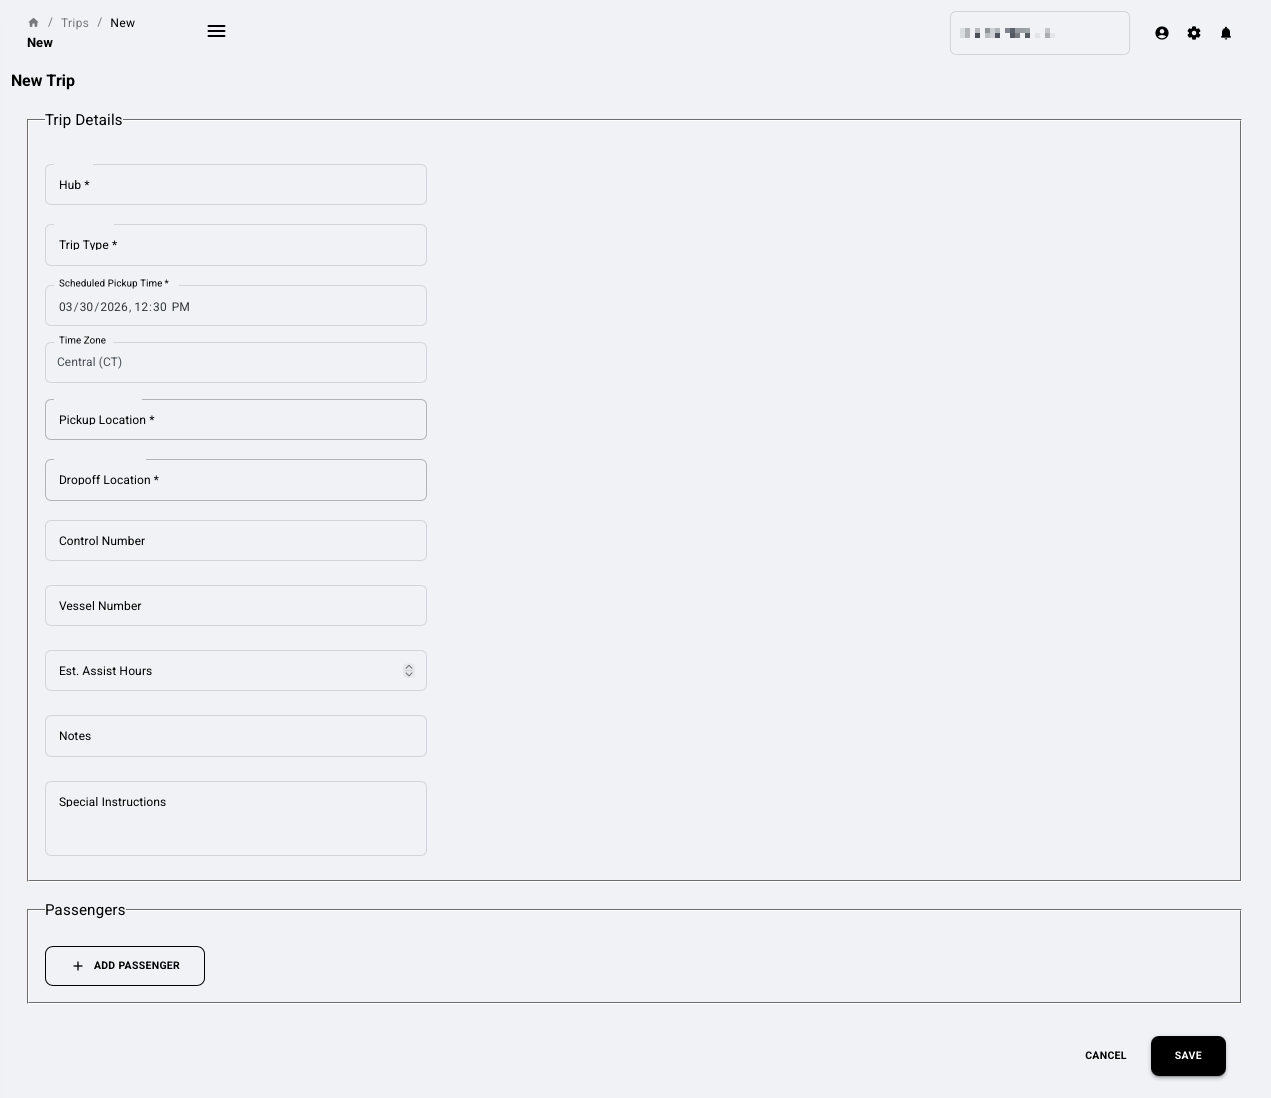
The New Trip form with trip details and passenger sections
Fill in the following fields to create a new trip:
Fields marked with * are required.
Use the + Add Passenger button to add crew members to the trip. You can add multiple passengers as needed. Each passenger entry allows you to specify crew member details.
When you have completed the form, click Save to submit the trip request, or Cancel to discard it.
The Client Portal includes interactive mapping features powered by Mapbox, giving you real-time visibility into your transportation operations.
The map view displays vehicle locations and hub positions in real time. You can:
For completed trips, you can view the exact route taken by the driver on an interactive map. Click on any trip to see the GPS route with directional markers, providing full transparency into trip execution.
The vehicle management view provides a comprehensive list of all vehicles serving your operations. This includes details such as unit number, hub assignment, vehicle description, type, license plate, and current trip assignment.
If you have an Admin role, you can manage your organization's portal users from the External Users section in the sidebar. The user management interface displays all users with their roles, status, sign-up dates, and last login times.
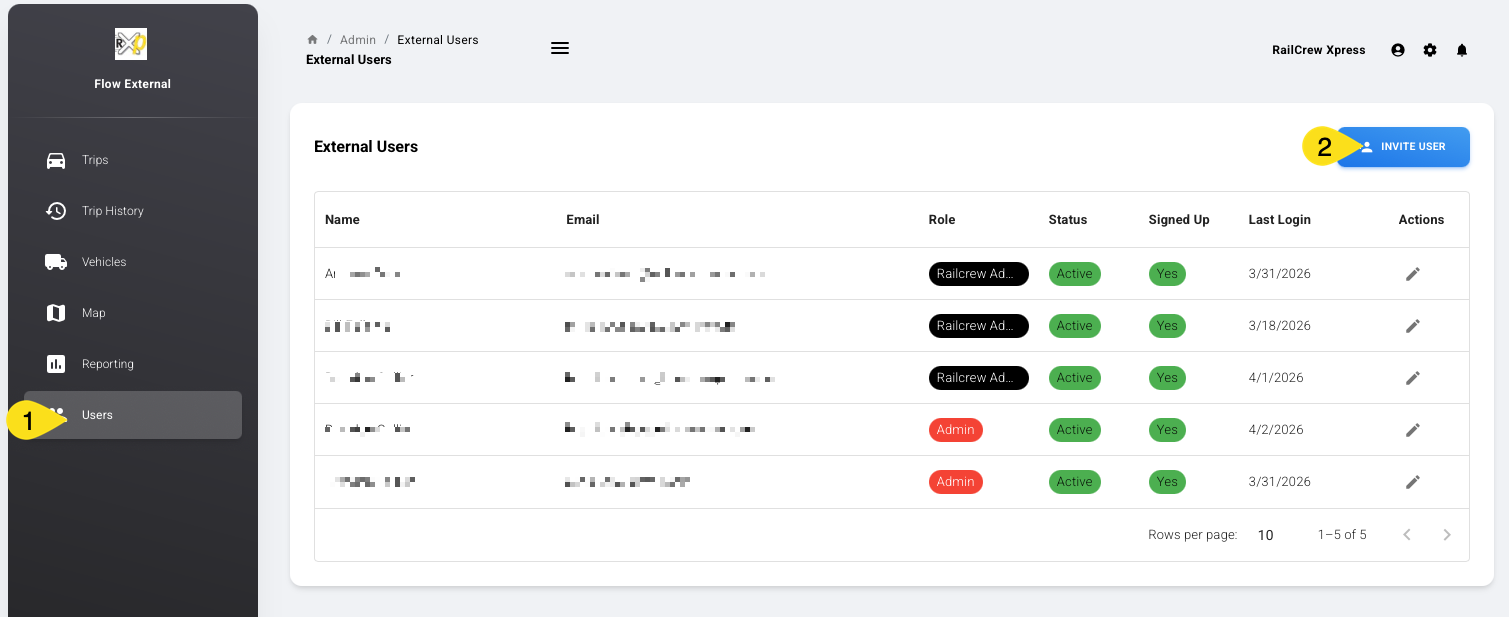
The user management page with role badges, status indicators, and the Invite User button
The user list shows:
To add a new user to your organization's portal access, click the Invite User button in the top right of the user management page.
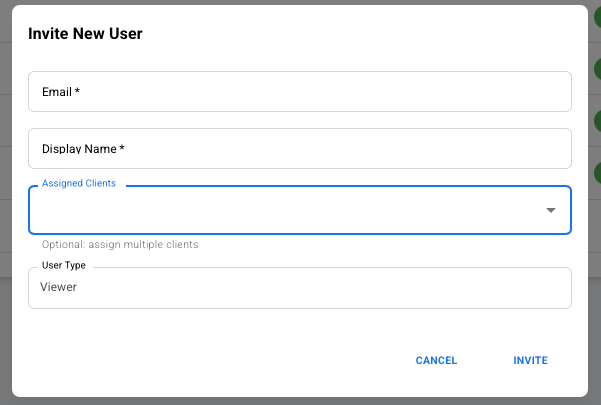
The Invite New User dialog
Fill in the following fields:
Click Invite to send the invitation. The new user will appear in the user list and will be able to sign in using the process described in the Logging In section.
The Client Portal leverages Microsoft Entra ID to provide enterprise-grade security for your organization:
If you have questions about using the Client Portal or need assistance with your account, the Railcrew Xpress support team is available to help.
Need help with the Client Portal? Reach out to our team.
Phone: (816) 702-6403
Email: info@railcrewxpress.com
Address: 101 Armour Road, Suite B, North Kansas City, MO 64116